How to install CodeIgniter in Debian 11.3
To Install CodeIgniter On Debian 11.3
Introduction:
CodeIgniter is a powerful PHP framework with a very small footprint, made for developers who need a simple and elegant toolkit to develop full-featured web applications.
Installation Procedure:
Step 1: Check the OS Version by using the below command.
[root@linuxhelp: ~#] lsb_release -a
No LSB modules are available.
Distributor ID:	Debian
Description:	Debian GNU/Linux 11 (bullseye)
Release:	11
Codename:	bullseye
Step 2: Previously, I installed the Apache webserver. Now check the status from Apache service by using the below command.
[root@linuxhelp ~]# systemctl status apache2
● apache2.service - The Apache HTTP Server
     Loaded: loaded (/lib/systemd/system/apache2.service; enabled; vendor preset: enabled)
     Active: active (running) since Thu 2022-10-27 12:48:34 IST; 17s ago
       Docs: https://httpd.apache.org/docs/2.4/
    Process: 65402 ExecStart=/usr/sbin/apachectl start (code=exited, status=0/SUCCESS)
   Main PID: 65406 (apache2)
      Tasks: 6 (limit: 3450)
     Memory: 17.6M
        CPU: 46ms
     CGroup: /system.slice/apache2.service
             ├─65406 /usr/sbin/apache2 -k start
             ├─65407 /usr/sbin/apache2 -k start
             ├─65408 /usr/sbin/apache2 -k start

             ├─65409 /usr/sbin/apache2 -k start
             ├─65410 /usr/sbin/apache2 -k start
             └─65411 /usr/sbin/apache2 -k start

Oct 27 12:48:34 linuxhelp systemd[1]: Starting The Apache HTTP Server...
Oct 27 12:48:34 linuxhelp systemd[1]: Started The Apache HTTP Server.
Step 3: Run the following command to install CodeIgniter.
[root@linuxhelp ~]# wget https://codeload.github.com/bcit-ci/CodeIgniter/zip/3.1.13
--2022-10-27 12:47:05--  https://codeload.github.com/bcit-ci/CodeIgniter/zip/3.1.13
Resolving codeload.github.com (codeload.github.com)... 20.207.73.88
Connecting to codeload.github.com (codeload.github.com)|20.207.73.88|:443... connected.
HTTP request sent, awaiting response... 200 OK
Length: unspecified [application/zip]
Saving to: ‘3.1.13’
3.1.13                                                   [<=>                                                                                                         ] 692.02K  2.55MB/s    in 0.3s

2022-10-27 12:47:06 (2.55 MB/s) - ‘3.1.13’ saved [708632]
Step 4: Next long list the directory by using the below command.
root@linuxhelp:~# ls -la
total 772
drwx------  5 root root       4096 Oct 27 12:47 .

drwxr-xr-x 19 root root       4096 Jul 14 12:54 ..
-rw-r--r--  1 root root     708632 Oct 27 12:47 3.1.13
-rw-------  1 root asterisk     18 Oct 27 12:44 .asterisk_history
-rw-------  1 root root       1610 Jul 25 15:55 .bash_history
-rw-r--r--  1 root root        571 Apr 11  2021 .bashrc
drwx------  3 root root       4096 Jul 14 13:00 .cache
drwxr-xr-x  3 root root       4096 Jul 14 15:12 .local
-rw-r--r--  1 root root      18012 Jan 17  2022 mysql-apt-config_0.8.22-1_all.deb
-rw-------  1 root root         43 Jul 14 15:19 .mysql_history
-rw-r--r--  1 root root        161 Jul  9  2019 .profile
drwxr-xr-x  3 root root       4096 Jul 25 16:52 .subversion
-rw-------  1 root root       6600 Jul 25 17:51 .viminfo
-rw-r--r--  1 root root         17 Jul 14 13:13 .vimrc
-rw-r--r--  1 root root        262 Oct 27 12:47 .wget-hsts
Step 5: Unzip the file by using the below command.
[root@linuxhelp ~] # unzip 3.1.13
Archive:  3.1.13
bcb17eb8ba53a85de154439d0ab8ff1bed047bc9
   creating: CodeIgniter-3.1.13/
  inflating: CodeIgniter-3.1.13/.editorconfig
  inflating: CodeIgniter-3.1.13/.gitignore
   creating: CodeIgniter-3.1.13/application/
  inflating: CodeIgniter-3.1.13/application/.htaccess
   creating: CodeIgniter-3.1.13/application/cache/

  inflating: CodeIgniter-3.1.13/application/cache/index.html
  inflating: CodeIgniter-3.1.13/system/libraries/User_agent.php
  inflating: CodeIgniter-3.1.13/system/libraries/Xmlrpc.php
  inflating: CodeIgniter-3.1.13/system/libraries/Xmlrpcs.php
  inflating: CodeIgniter-3.1.13/system/libraries/Zip.php
  inflating: CodeIgniter-3.1.13/system/libraries/index.html
Step 6: Again, listing the directory by using the below command.
[root@linuxhelp ~] ls -la
total 776
drwx------  6 root root       4096 Oct 27 12:47 .
drwxr-xr-x 19 root root       4096 Jul 14 12:54 ..
-rw-r--r--  1 root root     708632 Oct 27 12:47 3.1.13
-rw-------  1 root asterisk     18 Oct 27 12:44 .asterisk_history
-rw-------  1 root root       1610 Jul 25 15:55 .bash_history
-rw-r--r--  1 root root        571 Apr 11  2021 .bashrc
drwx------  3 root root       4096 Jul 14 13:00 .cache
drwxr-xr-x  4 root root       4096 Mar  3  2022 CodeIgniter-3.1.13
drwxr-xr-x  3 root root       4096 Jul 14 15:12 .local
-rw-r--r--  1 root root      18012 Jan 17  2022 mysql-apt-config_0.8.22-1_all.deb
-rw-------  1 root root         43 Jul 14 15:19 .mysql_history
Step 7: Now rename the extracted directory by using the below command.
[root@linuxhelp ~] mv CodeIgniter-3.1.13 codeigniter
Step 8: List the rename directory by using the below command.
[root@linuxhelp ~] ls
3.1.13 codeigniter
 mysql-apt-config_0.8.22-1_all.deb
Step 9: Next, Copy the unzipped file to “/var/www/html/” directory by using the below command.
[root@linuxhelp ~] cp -R codeigniter /var/www/html/codeigniter
Step 10: Then restart the apache2 service and check the status apache2 service by using the below command.
[root@linuxhelp ~] service apache2 restart
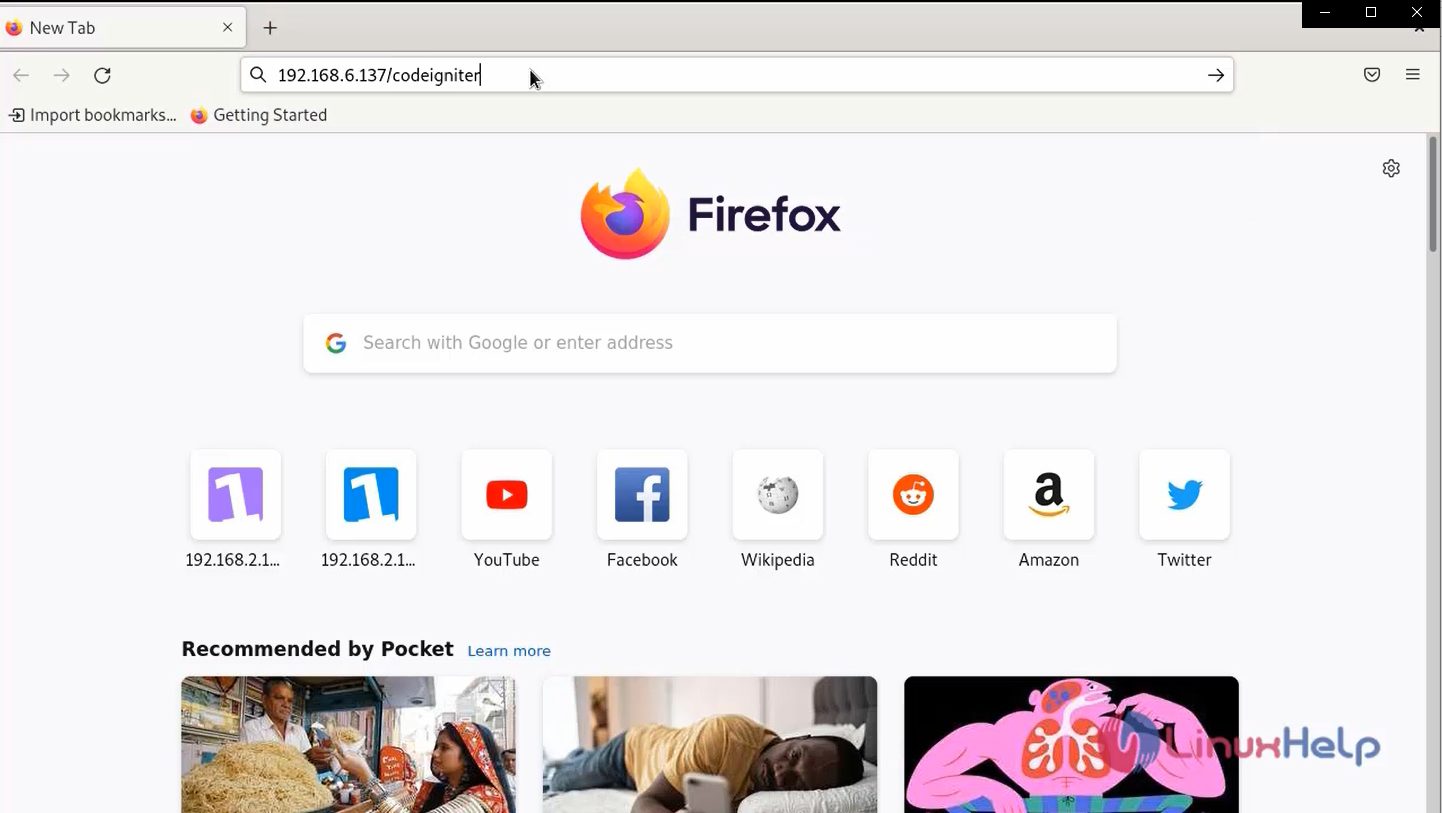
Step 11: Finally go to the browser and type http://< local_host> /codeigniter or http://< IP_address> /codeigniter as shown in the below image.
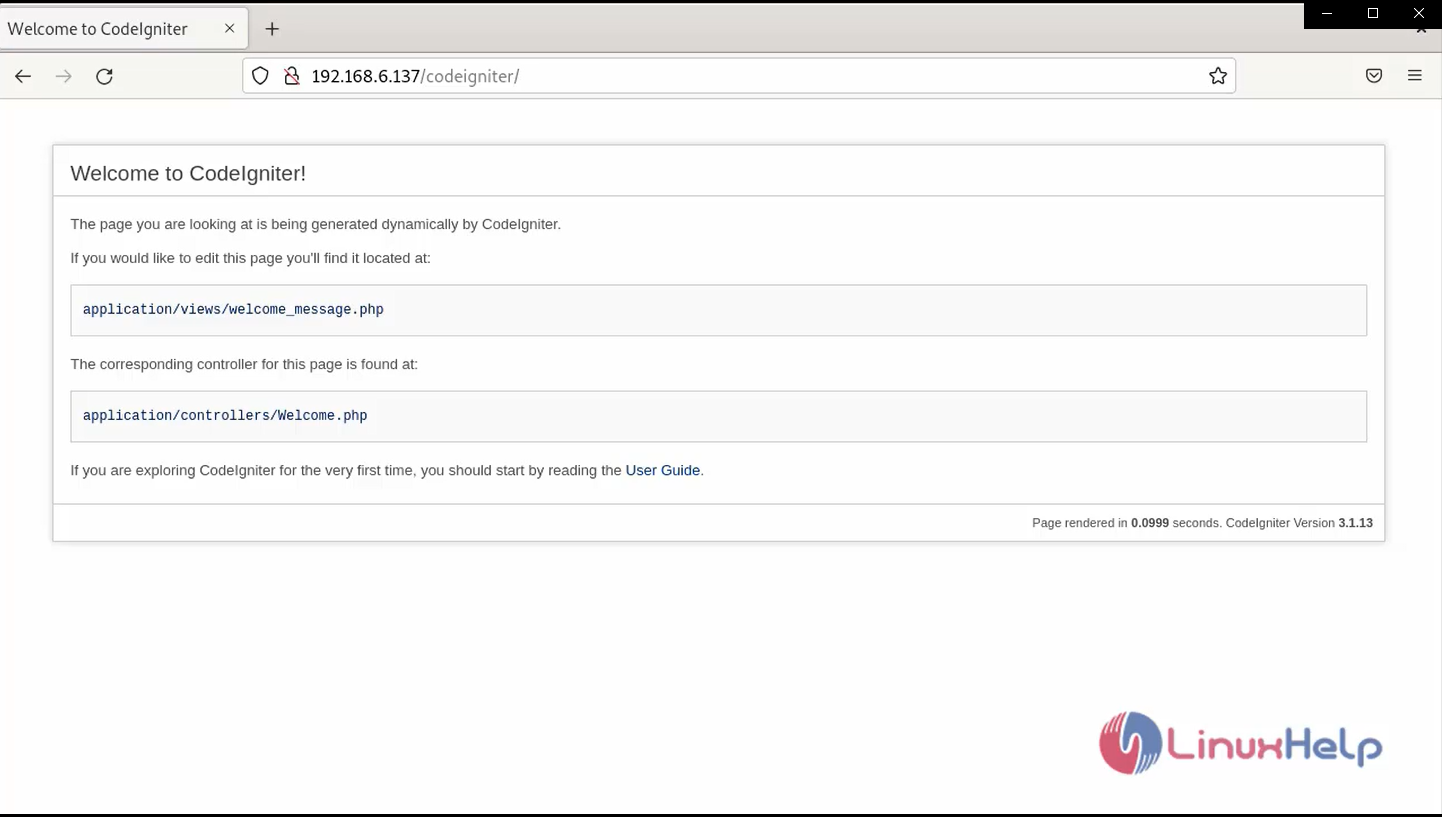
Step 12: This is the Welcome Page of CodeIgniter.
Conclusion:
We have reached the end of this article. In this guide, we have walked you through the steps required to install codeIgniter in Debian 11.3. Your feedback is much welcome.
Comments ( 0 )
No comments available