How To Install And Configure MySQL On Linux Mint 20.2
To Install And Configure Mysql Server On Linux Mint 20.2
Introduction :
MySQL is a relational database management system based on SQL – Structured Query Language. The application is used for a wide range of purposes, including data warehousing, e-commerce, and logging applications. The most common use for MySQL however, is for the purpose of a web database.
Step 1 : Check the OS Version by using the below command
root@linuxhelp:~# lsb_release -a
No LSB modules are available.
Distributor ID:	Linuxmint
Description:	Linux Mint 20.2
Release:	20.2
Codename:	uma
Step 2 : Install Mysql server by using the below Command
root@linuxhelp:~# apt-get install mysql-server
Reading package lists... Done
Building dependency tree
Reading state information... Done
The following additional packages will be installed:
  libevent-core-2.1-7 libevent-pthreads-2.1-7 libhtml-template-perl libmecab2 mecab-ipadic mecab-ipadic-utf8 mecab-utils
  mysql-client-8.0 mysql-client-core-8.0 mysql-server-8.0 mysql-server-core-8.0
Suggested packages:
  libipc-sharedcache-perl mailx tinyca
The following NEW packages will be installed:
  libevent-core-2.1-7 libevent-pthreads-2.1-7 libhtml-template-perl libmecab2 mecab-ipadic mecab-ipadic-utf8 mecab-utils


mysql-client-8.0 mysql-client-core-8.0 mysql-server mysql-server-8.0 mysql-server-core-8.0
0 upgraded, 12 newly installed, 0 to remove and 26 not upgraded.
Need to get 31.3 MB of archives.
After this operation, 261 MB of additional disk space will be used.
Do you want to continue? [Y/n] y
Get:1 http://archive.ubuntu.com/ubuntu focal-updates/main amd64 mysql-client-core-8.0 amd64 8.0.27-0ubuntu0.20.04.1 [4,423 kB]
Get:2 http://archive.ubuntu.com/ubuntu focal-updates/main amd64 mysql-client-8.0 amd64 8.0.27-0ubuntu0.20.04.1 [22.0 kB]
Get:3 http://archive.ubuntu.com/ubuntu focal/main amd64 libevent-core-2.1-7 amd64 2.1.11-stable-1 [89.1 kB]
emitting double-array: 100% |###########################################|
reading /usr/share/mecab/dic/ipadic/matrix.def ... 1316x1316
emitting matrix      : 100% |###########################################|

done!
update-alternatives: using /var/lib/mecab/dic/ipadic to provide /var/lib/mecab/dic/debian (mecab-dictionary) in auto mode

reading /usr/share/mecab/dic/ipadic/matrix.def ... 1316x1316
emitting matrix      : 100% |###########################################|

done!
update-alternatives: using /var/lib/mecab/dic/ipadic-utf8 to provide /var/lib/mecab/dic/debian (mecab-dictionary) in auto mode
Processing triggers for libc-bin (2.31-0ubuntu9.2) ...
Step 3 : Start the Mysql Service by using the below command
root@linuxhelp:~# systemctl start mysql
Step 4 : Enable the Mysql Service by using the below command
root@linuxhelp:~# systemctl enable mysql
Synchronizing state of mysql.service with SysV service script with /lib/systemd/systemd-sysv-install.
Executing: /lib/systemd/systemd-sysv-install enable mysql
Step 5 : Restart the Mysql Service by using the below command
root@linuxhelp:~# systemctl restart mysql
Step 6 : check the status of Mysql Service by using the below command
root@linuxhelp:~# systemctl status mysql
● mysql.service - MySQL Community Server
     Loaded: loaded (/lib/systemd/system/mysql.service; enabled; vendor preset: enabled)
     Active: active (running) since Sat 2021-12-25 23:01:09 IST; 14s ago
    Process: 7631 ExecStartPre=/usr/share/mysql/mysql-systemd-start pre (code=exited, status=0/SUCCESS)
   Main PID: 7652 (mysqld)
     Status: "Server is operational"
      Tasks: 38 (limit: 4579)
     Memory: 355.4M
     CGroup: /system.slice/mysql.service
             └─7652 /usr/sbin/mysqld

Dec 25 23:01:08 linuxhelp systemd[1]: Starting MySQL Community Server...
Dec 25 23:01:09 linuxhelp systemd[1]: Started MySQL Community Server.
Step 7 : Secure the Installation of mysql server by using the below command
root@linuxhelp:~# mysql_secure_installation


Securing the MySQL server deployment.

Connecting to MySQL using a blank password.

VALIDATE PASSWORD COMPONENT can be used to test passwords
and improve security. It checks the strength of password
and allows the users to set only those passwords which are
secure enough. Would you like to setup VALIDATE PASSWORD component?

Press y|Y for Yes, any other key for No: y

There are three levels of password validation policy:

LOW    Length >= 8
MEDIUM Length >= 8, numeric, mixed case, and special characters
STRONG Length >= 8, numeric, mixed case, special characters and dictionary                  file


Please enter 0 = LOW, 1 = MEDIUM and 2 = STRONG: 1
Please set the password for root here.

New password:

Re-enter new password:

Estimated strength of the password: 25
Do you wish to continue with the password provided?(Press y|Y for Yes, any other key for No) : y
By default, a MySQL installation has an anonymous user,
allowing anyone to log into MySQL without having to have


a user account created for them. This is intended only for
testing, and to make the installation go a bit smoother.
You should remove them before moving into a production
environment.

Remove anonymous users? (Press y|Y for Yes, any other key for No) : y
Success.


Normally, root should only be allowed to connect from
'localhost'. This ensures that someone cannot guess at
the root password from the network.

Disallow root login remotely? (Press y|Y for Yes, any other key for No) : y
Success.

By default, MySQL comes with a database named 'test' that
anyone can access. This is also intended only for testing,
and should be removed before moving into a production
environment.


Remove test database and access to it? (Press y|Y for Yes, any other key for No) : y
 - Dropping test database...
Success.

 - Removing privileges on test database...
Success.

Reloading the privilege tables will ensure that all changes

made so far will take effect immediately.

Reload privilege tables now? (Press y|Y for Yes, any other key for No) : y
Success.

All done!
Step 8 : Login to the mysql database by using the below command
root@linuxhelp:~# mysql -u root -p
Enter password:
Welcome to the MySQL monitor.  Commands end with ; or \g.
Your MySQL connection id is 10
Server version: 8.0.27-0ubuntu0.20.04.1 (Ubuntu)

Copyright (c) 2000, 2021, Oracle and/or its affiliates.

Oracle is a registered trademark of Oracle Corporation and/or its
affiliates. Other names may be trademarks of their respective
owners.

Type 'help;' or '\h' for help. Type '\c' to clear the current input statement.
Step 9 : Create the sample database by using the below command
mysql> create database linuxhelp;
Query OK, 1 row affected (0.01 sec)
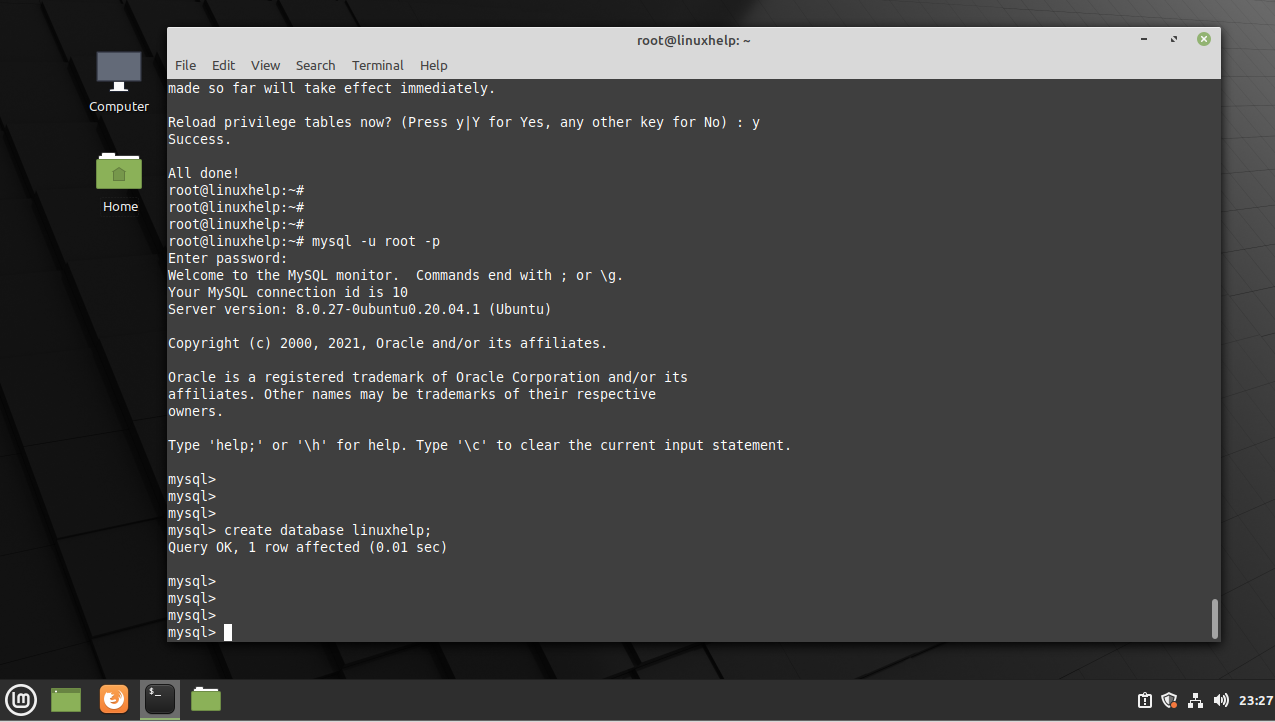
Finally the Instalation and configuration of mysql server on linux mint 20.2 has come to an end..!!
Comments ( 0 )
No comments available