How to install and Configure Apache Tomcat 8.0.23
Steps to Install and Configure Apache Tomcat 8.0.23 in CentOS 7
Tomcat is an open-source web server and servlet container developed by Apache Software Foundation and is written primarily in Java, which is released under Apache License 2.0. In this article we will learn the process of installing Apache Tomcat 8 (i.e. 8.0.23) on Linux systems, which includes RHEL, CentOS, Fedora, Debian, Ubuntu, etc.
Components of Tomcat
Jasper : It is the Tomcat’ s JSP Engine.
Catalina : It is the Servlet Container of Tomcat.
Web Application : Manage Sessions, Support deployment across different environments.
Coyote : Coyote acts as a connector and supports HTTP 1.1
High availability : A Tomcat component to schedule system upgrades and changes without affecting live environment.
Cluster : A component for load balancing to manage large applications.
Step 1:
To Install Java 8
Before installing Tomcat make sure you have the latest version of Java Development Kit (JDK) installed and configured on the system. It is preferred to use oracle Java.
Step 2:
To Download and Install Apache Tomcat 8
Once latest Java version is installed and configured, we will download and install latest stable version of Tomcat 8 (i.e. 8.0.23).
Next create a /opt/tomcat/ directory and download the latest version of Apache Tomcat 8 under this directory, also for cross checking the download file, download the hash file.
[root@linuxhelp Desktop]# mkdir /opt/tomcat/
[root@linuxhelp Desktop]# cd /opt/tomcat/
[root@linuxhelp tomcat]# ls -l
total 9428
-rwxrw-rw-. 1 root root 9651551 Apr  1 04:01 apache-tomcat-8.0.23.zip
[root@linuxhelp tomcat]#
Replace the version number in the above download link with the latest version available if it is different.
Now verify the MD5 Checksum against the key.
[root@linuxhelp tomcat]# md5sum apache-tomcat-8.0.23.zip
363375ec777e0d265403f1ec9a3d1011  apache-tomcat-8.0.23.zip
[root@linuxhelp tomcat]#
Extract the Tomcat zip and cd to ‘ apache-tomcat-8.0.23/bin/‘ directory.
[root@linuxhelp tomcat]# unzip apache-tomcat-8.0.23.zip
Archive:  apache-tomcat-8.0.23.zip
   creating: apache-tomcat-8.0.23/
   creating: apache-tomcat-8.0.23/bin/
   creating: apache-tomcat-8.0.23/conf/
   creating: apache-tomcat-8.0.23/lib/
   creating: apache-tomcat-8.0.23/logs/
. . .
. . .
inflating: apache-tomcat-8.0.23/webapps/manager/images/void.gif
  inflating: apache-tomcat-8.0.23/webapps/manager/index.jsp
  inflating: apache-tomcat-8.0.23/webapps/manager/status.xsd
  inflating: apache-tomcat-8.0.23/webapps/manager/xform.xsl
[root@linuxhelp tomcat]#
[root@linuxhelp tomcat]# cd apache-tomcat-8.0.23/bin
Now make the Linux scripts executable that is under ‘ apache-tomcat-8.0.23/bin/‘ and then create symbolic link of startup and shutdown script for tomcat as:
Change all scripts *.sh executable only for root as,
[root@linuxhelp bin]# chmod 700 /opt/tomcat/apache-tomcat-8.0.23/bin/*.sh
Create Symbolic link for startup script as, tomcatup
[root@linuxhelp bin]# ln -s /opt/tomcat/apache-tomcat-8.0.23/bin/startup.sh /usr/bin/tomcatup
Create Symbolic link for shutdown script as, tomcatdown
[root@linuxhelp bin]# ln -s /opt/tomcat/apache-tomcat-8.0.23/bin/shutdown.sh /usr/bin/tomcatdown
Now to start tomcat, run the below command as root from anywhere in the shell.
[root@linuxhelp bin]# tomcatup
Using CATALINA_BASE:   /opt/tomcat/apache-tomcat-8.0.23
Using CATALINA_HOME:   /opt/tomcat/apache-tomcat-8.0.23
Using CATALINA_TMPDIR: /opt/tomcat/apache-tomcat-8.0.23/temp
Using JRE_HOME:        /usr
Using CLASSPATH:       /opt/tomcat/apache-tomcat-8.0.23/bin/bootstrap.jar:/opt/tomcat/apache-tomcat-8.0.23/bin/tomcat-juli.jar
Tomcat started.
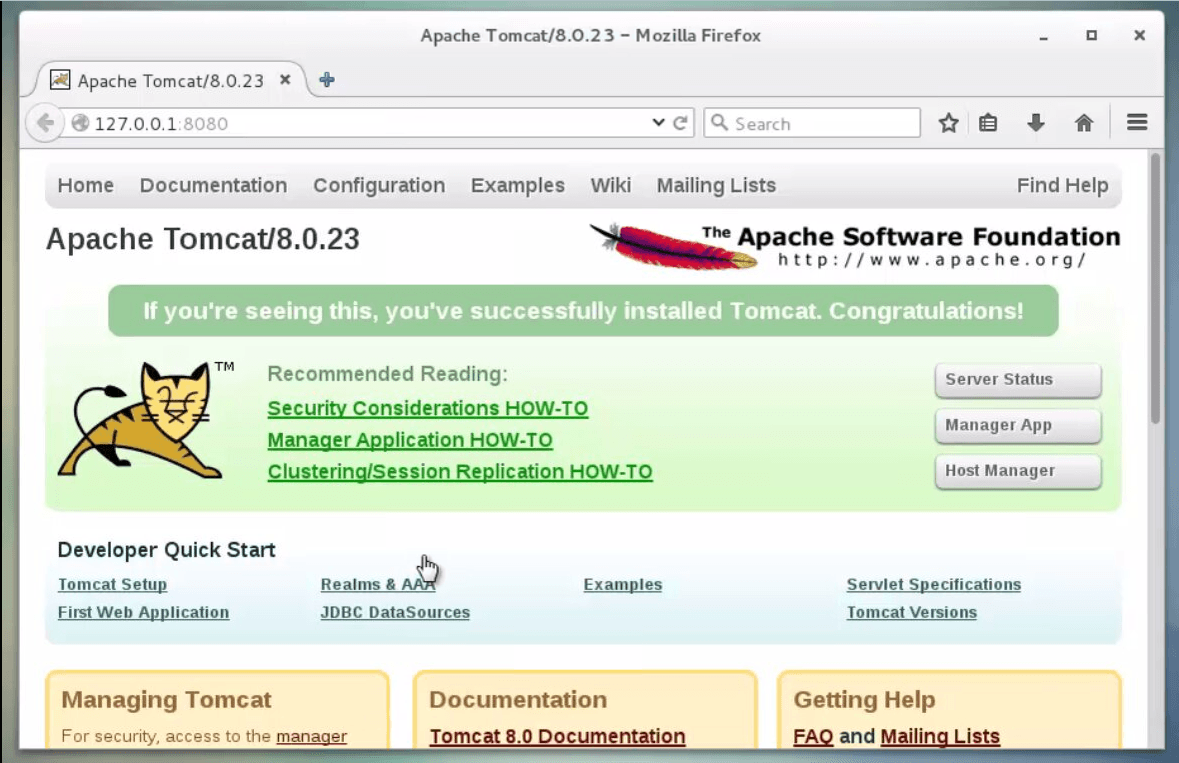
Once ‘ Tomcat Started‘ , you can point your browser to http://127.0.0.1:8080 and you should see something as below:
Step 3:
Changing Apache Tomcat Port
To change tomcat default port from the port 8080 to any other unused port (say 198), shutdown tomcat server by typing the below command from anywhere in the shell.
[root@linuxhelp bin]# tomcatdown
Using CATALINA_BASE:   /opt/tomcat/apache-tomcat-8.0.23
Using CATALINA_HOME:   /opt/tomcat/apache-tomcat-8.0.23
Using CATALINA_TMPDIR: /opt/tomcat/apache-tomcat-8.0.23/temp
Using JRE_HOME:        /usr
Using CLASSPATH:       /opt/tomcat/apache-tomcat-8.0.23/bin/bootstrap.jar:/opt/tomcat/apache-tomcat-8.0.23/bin/tomcat-juli.jar
Next, open the file using editor and edit it, here the path is ‘ /opt/tomcat/apache-tomcat-8.0.23/conf/server.xml‘ . Now change the default port 8080 to 198, save and exit.
[root@linuxhelp bin]# vim /opt/tomcat/apache-tomcat-8.0.23/conf/server.xml
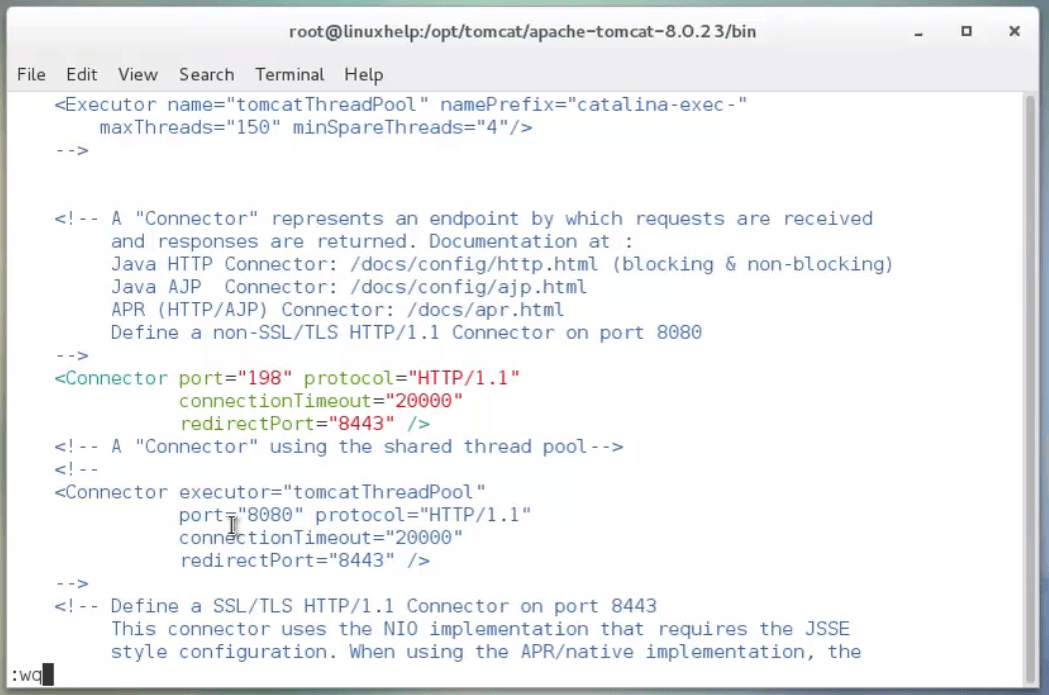
After changing port to 198, then restart tomcat service again and point your browser to http://127.0.0.1:198.
[root@linuxhelp bin]# tomcatup
Using CATALINA_BASE:   /opt/tomcat/apache-tomcat-8.0.23
Using CATALINA_HOME:   /opt/tomcat/apache-tomcat-8.0.23
Using CATALINA_TMPDIR: /opt/tomcat/apache-tomcat-8.0.23/temp
Using JRE_HOME:        /usr
Using CLASSPATH:       /opt/tomcat/apache-tomcat-8.0.23/bin/bootstrap.jar:/opt/tomcat/apache-tomcat-8.0.23/bin/tomcat-juli.jar
Tomcat started.

Similarly, you can use any port of your choice. Make sure the port you are using don’ t conflict with any other application/resource.
Step 4:
Configuring Apache Tomcat 8
By default the Tomcat page is accessed by you only due its security implementation so that unauthorized users don’ t have access to it. To access admin and other sections like Server Status, Manager App and Host Manager. You need to add user accounts for admins and managers.
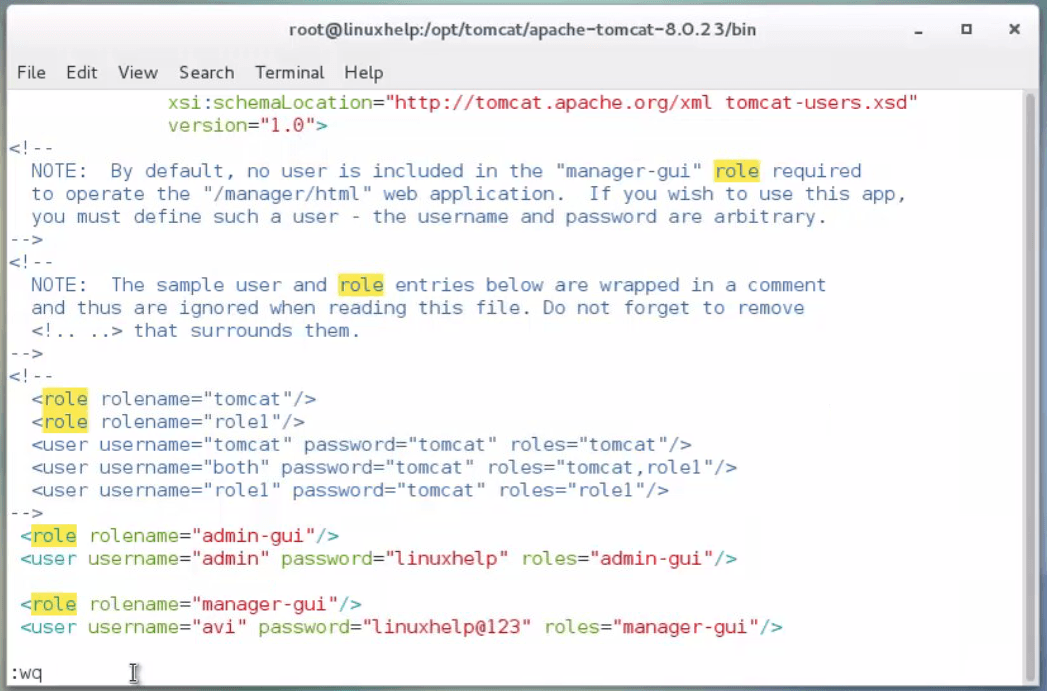
To add a Tomcat user edit file ‘ /opt/tomcat/apache-tomcat-8.0.23/conf/tomcat-users.xml‘ , in your favorite editor.
[root@linuxhelp bin]# vim /opt/tomcat/apache-tomcat-8.0.23/conf/tomcat-users.xml
10. Add the following lines just before ‘ ‘ .
Restart Apache Tomcat
Restart the Apache tomacat by running the tomcatup and tomcatdown command in the terminal.
[root@linuxhelp bin]# tomcatup
Using CATALINA_BASE:   /opt/tomcat/apache-tomcat-8.0.23
Using CATALINA_HOME:   /opt/tomcat/apache-tomcat-8.0.23
Using CATALINA_TMPDIR: /opt/tomcat/apache-tomcat-8.0.23/temp
Using JRE_HOME:        /usr
Using CLASSPATH:       /opt/tomcat/apache-tomcat-8.0.23/bin/bootstrap.jar:/opt/tomcat/apache-tomcat-8.0.23/bin/tomcat-juli.jar
Tomcat started.
[root@linuxhelp bin]# tomcatdown
Using CATALINA_BASE:   /opt/tomcat/apache-tomcat-8.0.23
Using CATALINA_HOME:   /opt/tomcat/apache-tomcat-8.0.23
Using CATALINA_TMPDIR: /opt/tomcat/apache-tomcat-8.0.23/temp
Using JRE_HOME:        /usr
Using CLASSPATH:       /opt/tomcat/apache-tomcat-8.0.23/bin/bootstrap.jar:/opt/tomcat/apache-tomcat-8.0.23/bin/tomcat-juli.jar
[root@linuxhelp bin]#
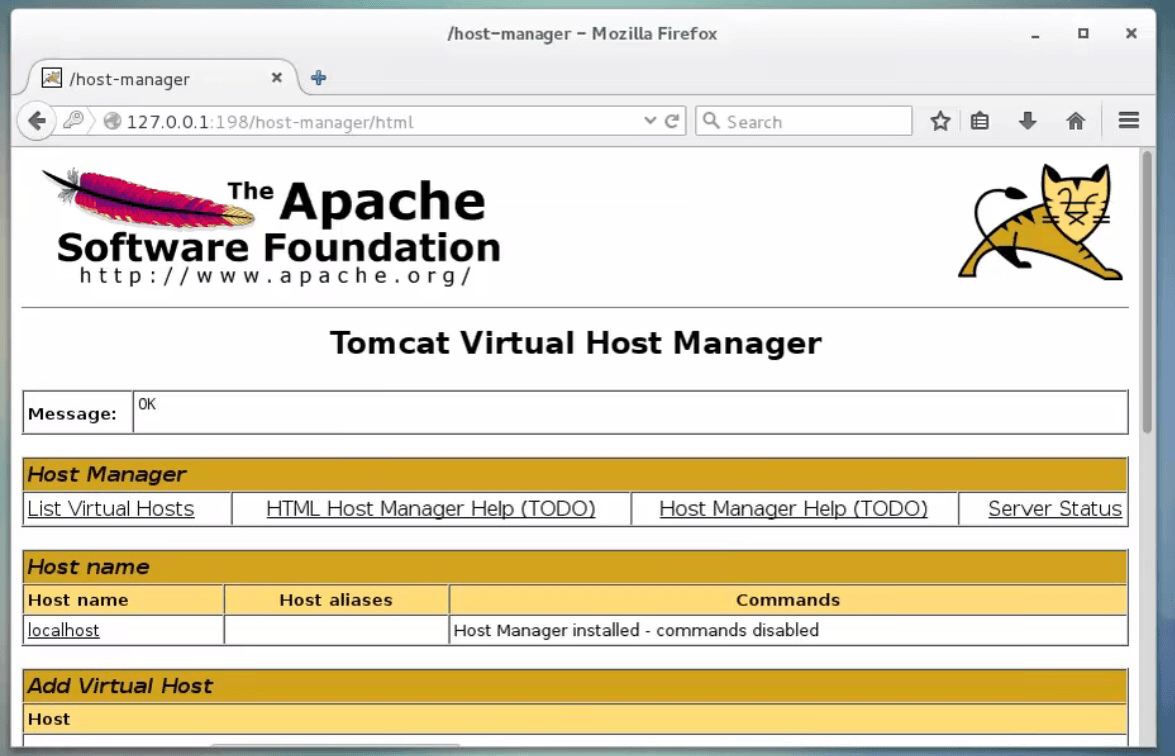
After restarting Tomcat, make sure to access the admin other sections like Host Manager, etc at http://127.0.0.1:198. It you will be asked to Enter User_name and Password, you just created above, after login you will see something like the below interface.

Your all setting and basic configuration of Tomcat has finished now. Now we will see a simple example, to run a simple basic jsp program run in Tomcat. It would be dumb if we do not show it.
Create a file called linuxhelp.jsp under ‘ /opt/tomcat/apache-tomcat-8.0.23/webapps/ROOT‘ directory.
[root@linuxhelp bin]# vim /opt/tomcat/apache-tomcat-8.0.23/webapps/ROOT/linuxhelp.jsp
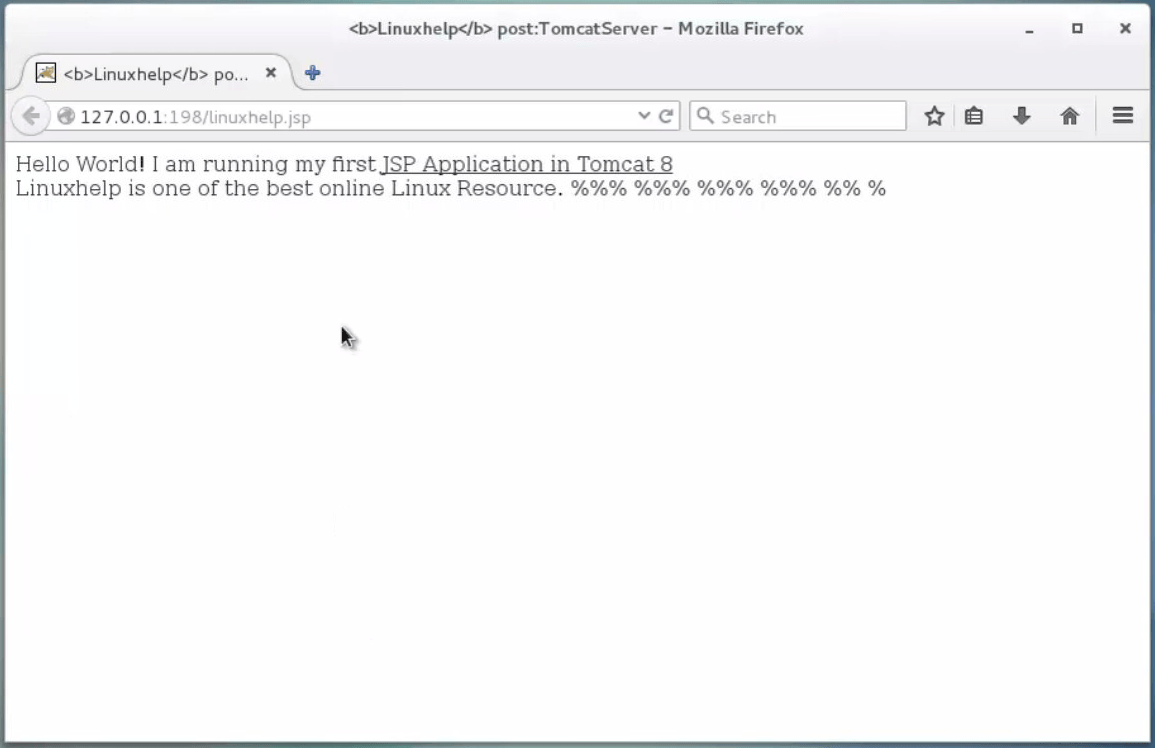
Now add the below contents in the new file (linuxhelp.jsp), save and exit.
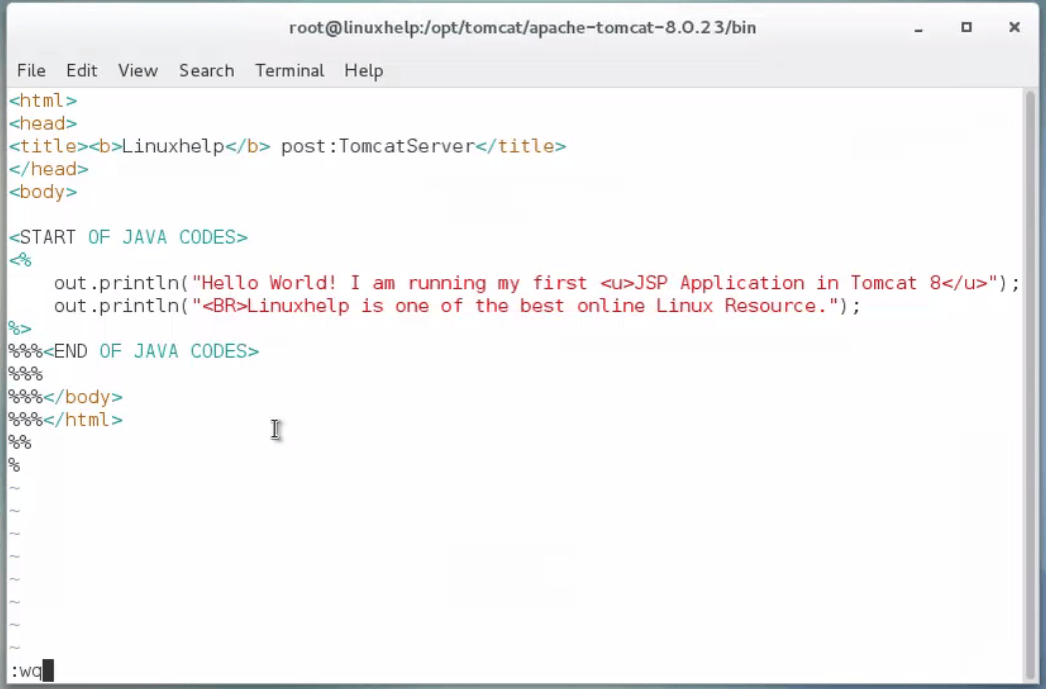
Most of the things in the above codes are self explaining. We have put simple Java code to print two lines of output and embed it in between HTML codes, which can be accessed at http://127.0.0.1:198/linuxhelp.jsp.
The above are steps to install and configure Apache Tomcat 8.0.23 in CentOS 7.
Comments ( 0 )
No comments available